관련 gist
https://gist.github.com/dsaint31x/b086fbddcb4d143a9fc4f0b610a2afee
np_split_stack_concatenate.ipynb
np_split_stack_concatenate.ipynb. GitHub Gist: instantly share code, notes, and snippets.
gist.github.com
1. numpy.vstack
numpy.vstack(tup) : Stack arrays in sequence vertically (rowwise)
- axis 0로 ndarray들을 붙임
- 2d image라면 위아래로 붙여지게 됨.
Simple example
import numpy as np

a = np.ones((4,3))
b = np.zeros((5,3))

c = np.vstack( (a,b) )
print(f"{c.shape = }") # c.shape = (9, 3)
Image example
import cv2
import matplotlib.pyplot as plt

img = cv2.imread('lena.png')
stacked_img = np.vstack((img,img))

plt.imshow(stacked_img[:,:,::-1])
plt.show()
결과는 다음과 같음.

numpy.vstack — NumPy v2.3 Manual
The arrays must have the same shape along all but the first axis. 1-D arrays must have the same length. In the case of a single array_like input, it will be treated as a sequence of arrays; i.e., each element along the zeroth axis is treated as a separate
numpy.org
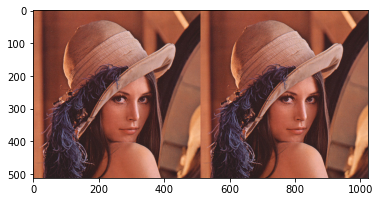
2. numpy.hstack
numpy.hstack(tup) : Stack arrays in sequence horizontally (column wise).
- axis 1로 ndarray들을 붙임
- 2d image라면 왼쪽으로 붙여지게 됨.
Simple example
import numpy as np

a = np.ones((4,3))
b = np.zeros((4,3))

c = np.hstack( (a,b) )
print(f"{c.shape = }") # c.shape = (4, 6)
Image example
import cv2
import matplotlib.pyplot as plt

img = cv2.imread('lena.png')
stacked_img = np.hstack((img,img))

plt.imshow(stacked_img[:,:,::-1])
plt.show()
결과는 다음과 같음.

numpy.hstack — NumPy v2.3 Manual
The arrays must have the same shape along all but the second axis, except 1-D arrays which can be any length. In the case of a single array_like input, it will be treated as a sequence of arrays; i.e., each element along the zeroth axis is treated as a sep
numpy.org
3. numpy.dstack
numpy.dstack(tup) : Stack arrays in sequence depth wise (along third axis).
- axis 2로 ndarray들을 붙임
- 2d image라면 깊이(채널) 방향으로 붙여지게 됨.
Simple example
import numpy as np
a = np.ones((4,3,3))
b = np.zeros((4,3,1))

c = np.dstack((a,b))
print(f"{c.shape = }") # c.shape = (4, 3, 4)
https://numpy.org/doc/stable/reference/generated/numpy.dstack.html
numpy.dstack — NumPy v2.3 Manual
The array formed by stacking the given arrays, will be at least 3-D.
numpy.org
4. numpy.concatenate
numpy.concatenate((a1, a2, ...), axis=0, out=None, dtype=None, casting="same_kind") :
Join a sequence of arrays along an existing axis.
- 위의
vstack,hstack을 대체할 수 있는 함수. - ndarray가 가지고 있는 기존의 axis(축)으로 병합을 수행함.
Simple example
import numpy as np

a = np.ones((4,3))
b = np.zeros((4,3))

print(np.concatenate( (a,b), axis=0 ))
print(np.concatenate( (a,b), axis=1 ))
결과는 다음과 같음:
[[1. 1. 1.]
 [1. 1. 1.]
 [1. 1. 1.]
 [1. 1. 1.]
 [0. 0. 0.]
 [0. 0. 0.]
 [0. 0. 0.]
 [0. 0. 0.]]
[[1. 1. 1. 0. 0. 0.]
 [1. 1. 1. 0. 0. 0.]
 [1. 1. 1. 0. 0. 0.]
 [1. 1. 1. 0. 0. 0.]]
Image example
import cv2
import matplotlib.pyplot as plt

img = cv2.imread('../../images/lena.png')
stacked_img = np.concatenate((img,img), axis=1)

plt.imshow(stacked_img[:,:,::-1])
plt.show()
결과는 다음과 같음.

numpy.concatenate — NumPy v2.3 Manual
>>> import numpy as np >>> a = np.array([[1, 2], [3, 4]]) >>> b = np.array([[5, 6]]) >>> np.concatenate((a, b), axis=0) array([[1, 2], [3, 4], [5, 6]]) >>> np.concatenate((a, b.T), axis=1) array([[1, 2, 5], [3, 4, 6]]) >>> np.concatenate((a, b), axis=None)
numpy.org
5. numpy.stack
numpy.stack(arrays, axis=0, out=None) :
Join a sequence of arrays along a new axis.
- 위의
vstack,hstack,concatenate가 기존의 axis중 하나로 병합하는 것과 달리 새로운 축을 추가하여 병합. - ndarray에 새로운 axis(축)으로 병합을 수행함.
axis파라메터에 지정한 축의 위치에 새로운 축이 추가되고 해당 축에 병합될 array들이 순서대로 요소에 할당됨.
Simple example
import numpy as np

a = np.ones((4,3))
b = np.zeros((4,3))

c = np.stack( (a,b), axis=1) # c.sahpe =(4,2,3)c[:,0,:]은 기존의a와 같음.c[:,1,:]은 기존의b와 같음
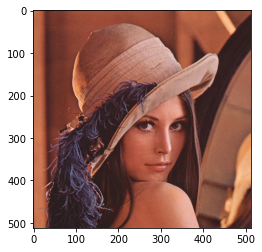
Image example
import cv2
import matplotlib.pyplot as plt

img = cv2.imread('../../images/lena.png')
stacked_img = np.stack((img,img), axis=0)

plt.imshow(stacked_img[0,:,:,::-1])
plt.show()- 2개의 lena이미지가 axis 0에 각각 index=0, index=1인 요소에 할당됨.
- 이미지 출력은
stacke_image[0]임. ( opencv가 BGR모드에 대한 처리를 하기 위해 풀어서 기재)
결과는 다음과 같음.

numpy.stack — NumPy v2.3 Manual
Each array must have the same shape. In the case of a single ndarray array_like input, it will be treated as a sequence of arrays; i.e., each element along the zeroth axis is treated as a separate array.
numpy.org
같이 보면 좋은 자료들
[Summary] NumPy(Numerical Python)
파이썬 생태계에서 과학적 계산의 기본이 되는 라이브러리 NumPy 소개 : NumPy는 파이썬에서 과학 계산과 수치 연산을 효율적으로 처리하기 위한 라이브러리 n-dimensional array(다차원 배열)인 ndarray
ds31x.tistory.com
'Programming > DIP' 카테고리의 다른 글
| PIL과 opencv에서의 image 변환. (1) | 2021.11.22 |
|---|---|
| Conda backup for DIP 2021 (0) | 2021.09.18 |
| NumPy : sum, mean, std, and so on (0) | 2021.09.17 |
| NumPy 검색 (0) | 2021.09.11 |
| NumPy 배열 나누기: 영상 자르기 - split (1) | 2021.09.11 |